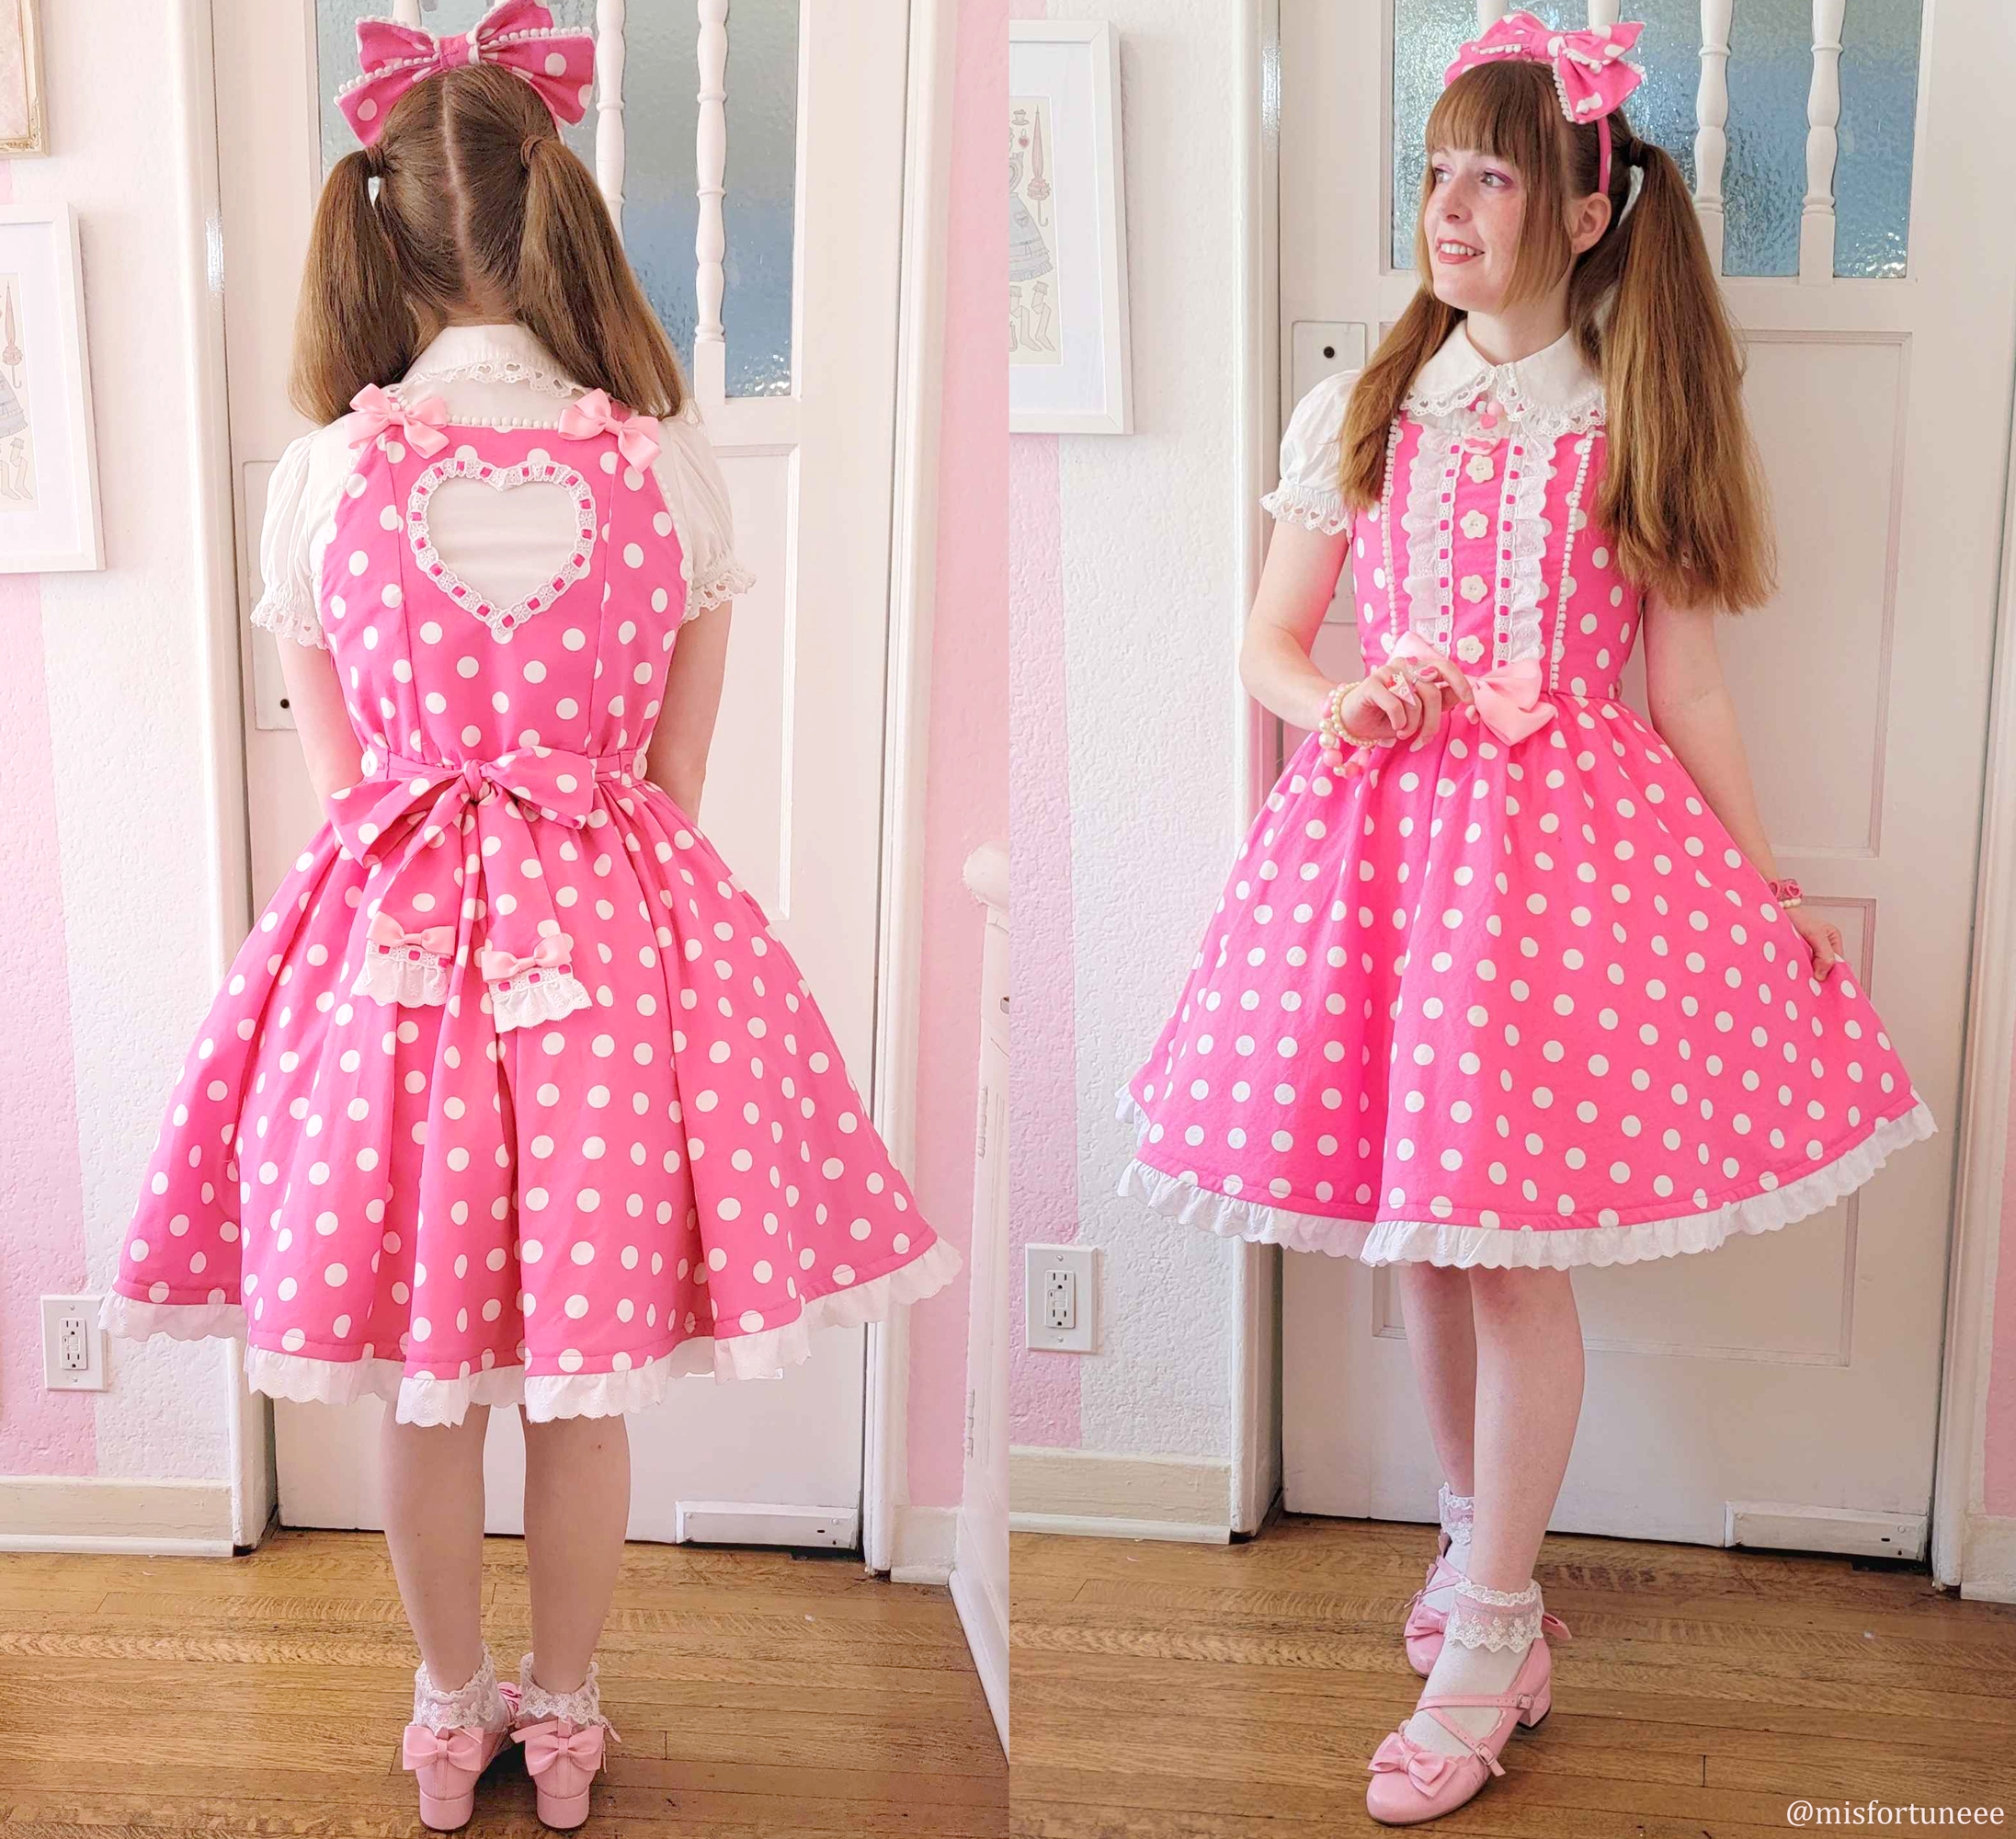
Sewing a Heart Cutout JSK

A while back I bought some gorgeous pink corduroy from Joanns while picking up something for another project. It was just such a perfect color in my mind that I couldn't let myself leave without it, especially since I have felt myself particularly drawn to velveteen type fabrics lately. I wasn't sure what exactly I wanted to do with it right away but seeing how delightfully bright pink the fabric was, I couldn't resist and just went ahead and bought it with no plans! And then one day while whistfully looking at a listing for Angelic Prettys Heart Cutout JSK it all came together.
 |
| Heart Cutout JSK |
I had made a heart cutout dress previously around the time the Barbie movie came out so I was feeling somewhat confident on by ability to do it again.


The dress I affectionately call my Barbie Dress :)
I was so delighted by a dress in the trailer that I wanted to have my own version!
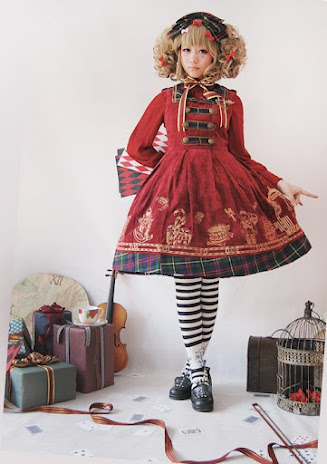
So after seeing this stunning piece from Angelic Pretty (21 years old... I am dust) stuck sitting on Mercari and I knew it would be the perfect inspiration for my fabric!


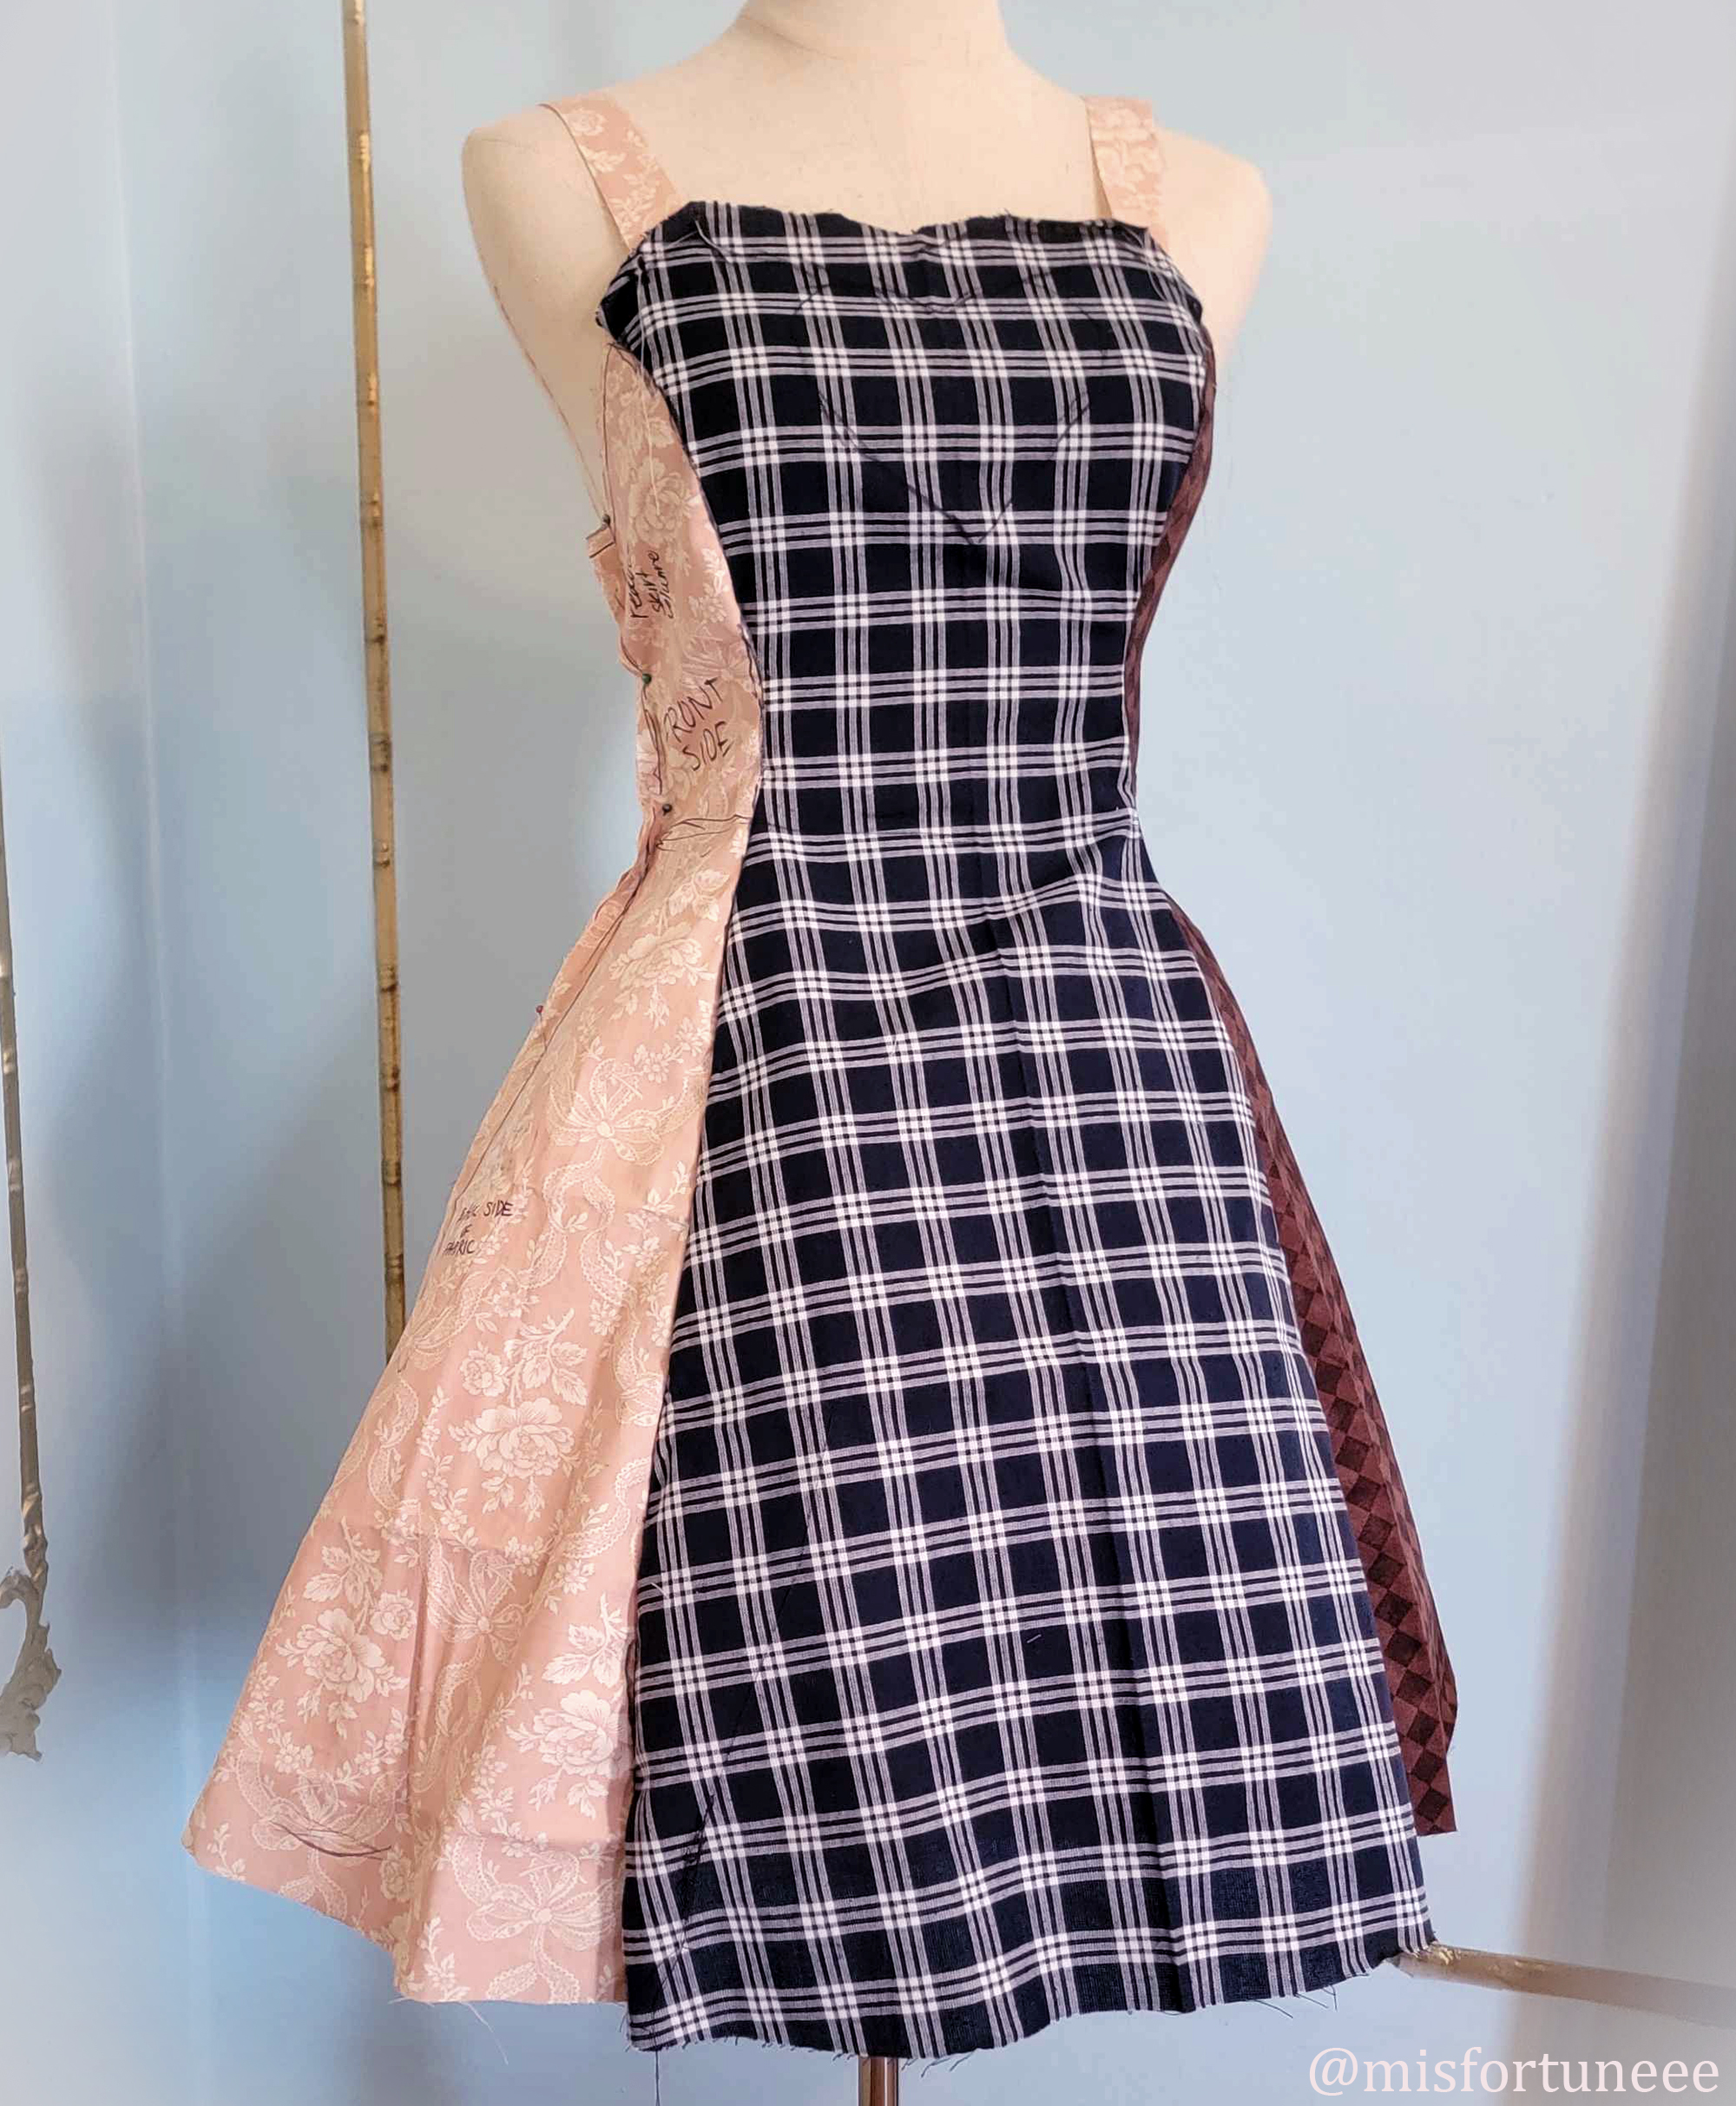
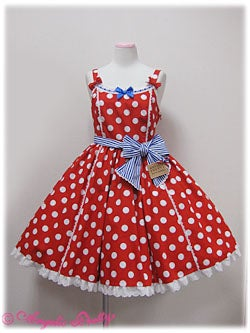
Some other inspirations are Baby the Stars Shine Brights Hem Scallop 2004 (which I happen to own) and Angelic Prettys Heart Appliqué
Once I had all my supplies and finally found some time to get going I started by copying the base pattern from Hem Scallop onto some butcher paper I have at home. I use this paper for all sorts of crafting projects so while its not the best for copying patterns from an existing garment, it works great for other projects!

Some of my favorite motifs in lolita fashion are scallops, hearts, and appliqués. (I also very much like pom poms but I haven't made anything with them just yet!) So I included them in my design in a way that I think helped amplify the cutout and still feels in line with some of the design sense of older lolita pieces. I find that older pieces tend to have more visual rest area to help each individual focal element shine and not get lost in the rest of the dress, and I was hoping to emulate that feeling!
Finally I ended up with the design you see above, an a-line, princess seam dress, with heart appliqués, scallops around the hem, and a heart cutout on the chest. My good friend Sandy and I went for a fun shopping trip to the Los Angeles Fashion District and I found all sorts of gorgeous lace to use in my project as well as some precious heart lace gifted to me by a sewing friend of mine, Blue.
Once I had all my supplies and finally found some time to get going I started by copying the base pattern from Hem Scallop onto some butcher paper I have at home. I use this paper for all sorts of crafting projects so while its not the best for copying patterns from an existing garment, it works great for other projects!


I picked this dress to copy the pattern from for a variety of reasons; the fact that its A-line is the biggest reason, but I also personally feel like the way the back of the dress rises so high gives it an old school feeling in a way that some of my other choices do not. I also initially thought I might copy the way that Baby did the scallops on the dress so it was nice to have nearby while I worked.

After copying the pattern I made a quick mockup (using leftover fabric I had around) to make adjustments to the pattern. I made some small changes to the fit as well as some changes to the fullness so it was slightly fuller than the base. It was an interesting challenge balancing how and where the fullness of the dress fills out based on the shape of the skirt pattern pieces!

After finalizing the mockup, I went ahead and copied it over to more butcher paper, creating the final pattern pieces. Probably a good time as any to mention that this is a mannequin I bought last year to make my wardrobe post and isn't actually intended for sewing and doesn't even match my measurements. But she is helpful to see things so I used her throughout the project!


As I was drawing out the patterns, I went ahead and left the cutout and scallops out of the final pieces so that I can use this pattern for more than just one project. Another reason I like using this butcher paper is that its very sturdy and can be used several times for many projects and stays together well. I have some other projects floating around in my head so if I use this specific pattern again and make another post about it I will be sure to mention it!
The next step is to cut the peices out of the outer fabric and the lining fabric! I also went ahead and made some specific shapes for facing peices on the lining and around the heart cutout where I figured the interior fabric might show.
The next step is to cut the peices out of the outer fabric and the lining fabric! I also went ahead and made some specific shapes for facing peices on the lining and around the heart cutout where I figured the interior fabric might show.
You'll notice here where I laid out my pieces I made a slight error I only noticed later; my peices will have pile directions going opposite each other on the final dress. It's not terrifically noticeable because it's corduroy and such a bright color but I wanted to call it out. It's something I completely forgot about since I've never sewn with this material before!


Before sewing anything together this was also the time I took to go ahead and add some stabalizing basting stitches around the edges of all of the corduroy peices. This was my first time sewing with material like this and it was pretty shifty so I wanted to protect it from stretching too much while I put everything together, especially since I didn't include any registration marks on my patterns lol

I also decided to start by sewing together the lining so I could go ahead and get to know the material a bit better before I sewed the important seams! Because my lining included facing pieces it was a good opportunity to mess up where it wouldnt be too visible. First I pressed the seams so I would have a clear fold to pin the other pieces onto, and stitched it quickly together. I also learned that for me, steaming seamed to work the best when I needed to press any of the corduroy seams so as to not crush the pile.


You'll notice that my lining puckered a little bit while I was putting these together but honestly I cannot be bothered to fix lining, especially since I was dealing with some issues on my sewing machine around this point in the project.
Speaking of my sewing machine, I guess I should show you what I sew everything on!

While this isnt my only sewing machine it is the current one that works. It is a White Rotary treadle sewing machine from 1920! So she is ~105 years old and I love her dearly. As much as she gives me issues from time to time I also think she's stunning so I cant be mad at her too much. During this project I was struggling with the thread snapping as I was sewing, while it happened more with my cotton thread than my polyester thread, it seemed to be in combination with my upper thread occasionally not being properly grabbed to go around the bobbin... I'm still not entirely sure what all was happening but with some tightening of different screws she runs slightly better somehow...
ANYWAY so as I was putting together the lining pieces I also realized the only interfacing that I had wasn't fusible interfacing so I needed to sew it to the corduroy before I attached it to the rest of the lining. I wanted to include some lining into the chest area due to the heart cut out. I had done something similar in the heart cut out of my Barbie dress and I found that it helped hold the heart in the right shape. For this dress specifically I knew it would also have the ribbon lacing and I wasn't sure how that would affect the overall outcome, especially since I also knew that the corduroy has a bit less body than the basic woven cotton of my Barbie dress.
ANYWAY so as I was putting together the lining pieces I also realized the only interfacing that I had wasn't fusible interfacing so I needed to sew it to the corduroy before I attached it to the rest of the lining. I wanted to include some lining into the chest area due to the heart cut out. I had done something similar in the heart cut out of my Barbie dress and I found that it helped hold the heart in the right shape. For this dress specifically I knew it would also have the ribbon lacing and I wasn't sure how that would affect the overall outcome, especially since I also knew that the corduroy has a bit less body than the basic woven cotton of my Barbie dress.

I also decided that if there would be tension on this area due to the lacing element that I should probably put the interfacing on the bias so that the bias of each both fabrics would make up for each others stretch directions. I think it ended up helping and working pretty well! But I have never tried anything like this before and honestly I'm not sure if this is standard or a good choice.

And here is the lining all put together! I went with a cotton lining because the heat in LA is no joke and I like everything being as breathable as possible.
The next thing to do was to put together the outer fabric, and I ALMOST forgot to add a pocket but thankfully at the very last second I remembered and slipped in two deep phone-sized pockets on each side of the dress.
The next thing to do was to put together the outer fabric, and I ALMOST forgot to add a pocket but thankfully at the very last second I remembered and slipped in two deep phone-sized pockets on each side of the dress.


And then the outer fabric was done and all sewn together as well!


So as I sat there and thought about this dress I came to the conclusion that I should do the heart cut-out dead last. Every time I thought about how I would attach the bag lining on this dress it seemed like it would be absolutely impossible to turn things inside out while having that heart inserted early since it would have to be top stitched and would attach the lining and outer fabrics together in one direction. Considering that, I decided to go ahead and start mocking up how I would attach all of the trims to the dress!

I started by pining the dress with the overall shape of the scallop size I wanted as well as the heart lace and heart appliqués including their trim and the lace on the hem! It was really exciting to see the dress at this point because it was actually starting to feel like a real thing instead of something that lived in my head.


Next step was to make each of the six little hearts that would appear around the hem of the dress. This part was pretty simple, I just needed to be sure I was careful to make each of them really neat so overall they would match. I started by pressing the hems under which you can just see in the first photo and then stitched the lace on using the fold as a guide, and then they were good to go!

To make sure all of the proportions were feeling correct I waited to stitch them onto the dress until I pinned the scallops. So I once again, hung everything up on my dress form and started measuring and pinning out the rest of the scallops.


After roughly pinning the scallops I took the whole dress and laid it on my pattern table to pattern out the scallop and make sure each one was exactly the same. After getting the basic shape from where I pinned up the dress, I used the string and pen trick to make sure my arc was gentle and symmetrical for the final pattern piece. After I had the final paper pattern I used it to cut out 6 scallop lining pieces that I then sewed to the hem to create the final scallops. It's a little difficult to explain so I hope that makes sense!
After the scallops were done I used them as a guide to attach all the heart lace trim and the heart appliqué pieces. I top stitched them both down making sure to avoid catching the facing of the scallops.
After the scallops were done I used them as a guide to attach all the heart lace trim and the heart appliqué pieces. I top stitched them both down making sure to avoid catching the facing of the scallops.


Afterwards I gently hand sewed the lace trim on the hem of the dress. I looked to emulate the way the boarder lace peaks out from behind the scallops on the Baby dress I was referencing. I also waited to blind stich the scallop facing, you can see how it sags down and looks a bit sad in the above image. This will be finished later!

You can also see in this image how the scallops were done differently on Hem Scallop than mine. The 2004 Hem Scallop also doesn't have a full lining on the inside so its not terrifically surprising to me that they prioritized things like lace quality over these more fiddly details. But for my dress, I think this type of top stitching would be very obvious with the corduroy going in the opposite direction.


After hand stitching down the scallop facing with a blind stich I decided to move onto the shoulder straps. Because I wanted this dress to have an old school feeling I decided to emulate the appearance of elasticated straps, however because I didn't want to deal with them getting stretched out from hanging and I was sewing this dress specifically for myself, I decided to just fake the look. It took me a while to decide how I was going to go about it but I eventually decided on the above. I started by pressing the seams down on a piece of fabric that was the wider and longer than my final strap dimensions. Then using the folds as guides I pinned and sewed down this absolutely adorable lace I had been keeping for a special occasion. Then I pressed the seams down on the shorter strip that would be the correct length of my straps and pinned the longer piece to it with their right sides together, gathering the extra fabric along the way. You can see these steps in the first image above. After sewing it down and flipping the tube right sides out I had the straps you can see in the second image, which I took careful time to pin the ruffles down into slightly tighter shapes, emulating the look of a gathered strap. After intensely steaming those gathers I then did two lines of stitches down either side of the strap and voila, beautiful fake gathered straps!
It took me quite a bit of puzzling to figure out how to get them looking how I wanted but I am very happy with the outcome and if I ever decide to make a dress with elastic straps again I will probably go for something like this!
The next big step was to attach the lining and facing fabric and to insert the zipper. I double checked about where I wanted the heart cut out and cut a small v out of the front of the bodice so it would follow the heart shape of the cut out. After attaching the lining, I also under stitched the seam to have a clean edge around the top of the dress. I didn't take too many photos during these steps as I was in a hurry to finish because of an event I wanted to wear the dress to. (I didn't end up finishing in time anyway) But I don't really need to be blog number ten thousand going over how to insert an invisible zipper anyway!
After attaching the zipper and lining it was FINALLY time to tackle the part of the dress I had wanted to do from the very beginning, the design feature that inspired the dress, the heart cut out!!

The first step was to decide where exactly the heart would go. I pinned it, I put the dress on, I took it off, I pinned it again, I put it on the dress form, I stood back from it several feet, I took a photo and looked at in the photo. I check and checked and checked before I was absolutely sure because once you cut into the FRONT of the dress, there really is no going back!


Once I felt confident I finally actually cut into the dress, leaving myself about .5" seam allowance around the outside of the heart. It was a tense moment! I then carefully pinned making sure to have the outside of the heart match the paper pattern. After pinning and repinning until the hole matched the paper pattern I heavily steamed this area of the dress front and back.

At first I simply pinned the seam allowance towards the inside of the dress so I wouldn't be fighting with pinning everything towards the inside of the bag lining all in one go. So after it had been thoroughly steamed I then turned over to the inside of the dress and used the outer fold line as a guide to steam the lining layer towards the inside of the bag lining as well.

It was a little late in the evening at this point which is always the worst time to be sewing but I ended up sewing three different types of lace around this heart. First I hand stitched on the small lace I also used on the shoulder straps, second I machine sewed looped trim behind that lace to use for the corset lacing, and then finally the same scalloped lace I used on the applique hearts around the hem. I top stitched it down twice, once near the inside of the cutout and once near the edge of the open section of the lace. WHEW. I think maybe I didn't need to use three different types of lace here, but I like the thought behind why and I think it still came out quite pretty even if its a bit chaotic.
And with that done, all the dress needed was some internal stitching to hold the lining near the hem and to hold the pockets towards the front of the dress and it was complete!


I also made a head bow which I didn't document at all but it has wire so its very posable!
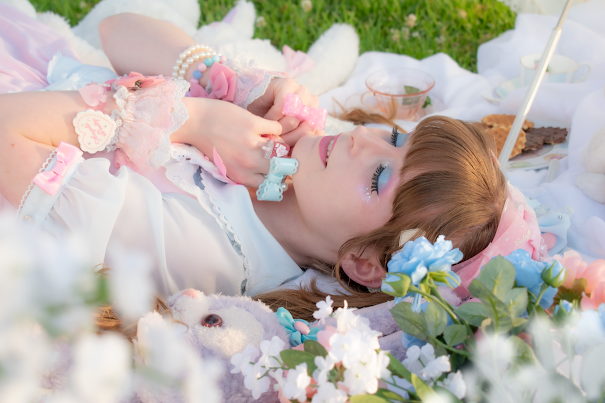
This dress was a long time in the making but collecting some supplies and waiting for the perfect trim and inspiration was well worth it! I couldn't be happier with the final outcome. I'm also super glad I got it done so I can wear it for Valentines month even if I will be busy on the actual day.
Here I am wearing it during my recent trip to Dublin and London! I think it matches well with the VW bag!


I hope this post inspired you to sew your own lolita pieces as well! It's so rewarding to be able to pick and choose your favorite elements to really make the project special! If it does inspire you please let me know and share it with me on instagram, I'd be delighted to see!

May Mana-sama bless you in these trying times.


Comments
Post a Comment